Copying Blu-ray to USB for Sony 4K Ultra HD TV, on the one hand, can make you enjoy Blu-ray movies without needing heavy external Blu-ray drive and cable. And on the other hand, it offers you convenience carriage and safe storage. And this process will be easy under the help of Pavtube BDMagic(Review). It can easily rip and backup the latest and region-locked Blu-ray to Sony UHD 4K TV supported MPEG1, MP4 formats. In profile settings, it allows you to adjust video codec, size, frame rate, bitrate and audio channel, codec, size, sample rate to get better video quality for Sony UHD 4K TV. Actually, it not only can backup Blu-ray to Sony 4K TV supported formats, it also can change Blu-ray to H.265, M3U8, MKV, AVI, MOV, M4V, etc to play on iPad, Android tablet and so on.
You can Free download and install BDMagic here:


Other Download:
- Pavtube old official address: http://www.pavtube.cn/blu-ray-ripper/
- Cnet Download: http://download.cnet.com/Pavtube-BDMagic/3000-7970_4-75922877.html
How to watch Blu-ray on Sony 4K Ultra HD TV via USB?
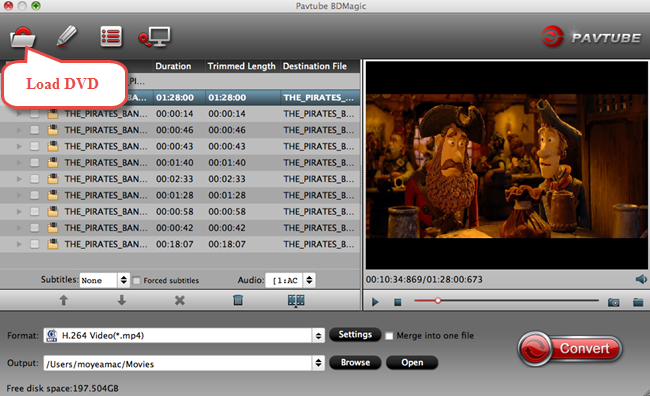
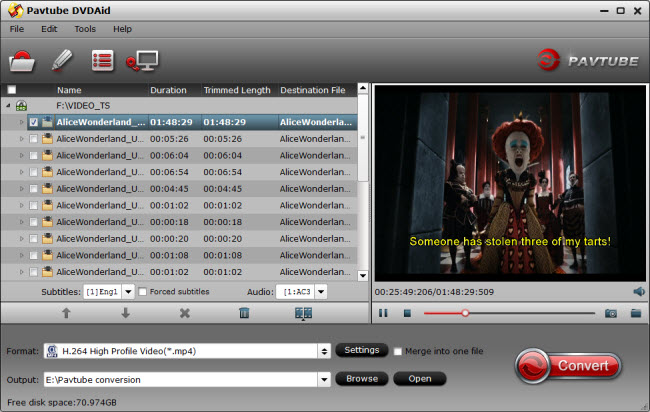
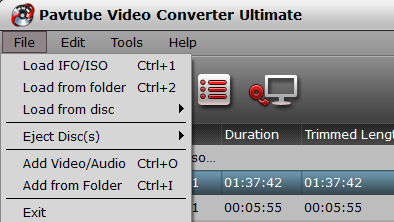
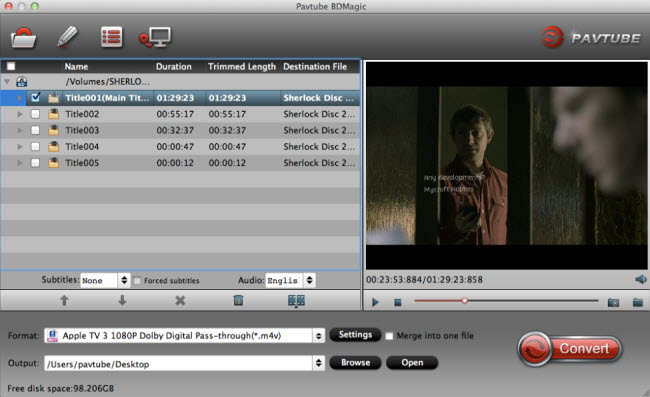
Step 1: Load Blu-ray movie.
Insert Blu-ray disc into your computer Blu-ray drive, click "File" to load Blu-ray disc.
Tips: Click "Subtitle" and "Audio" drop-down box to select your preferred subtitle track and audio stream.

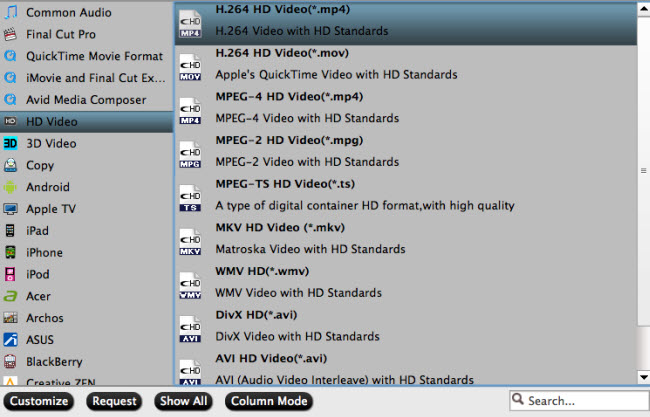
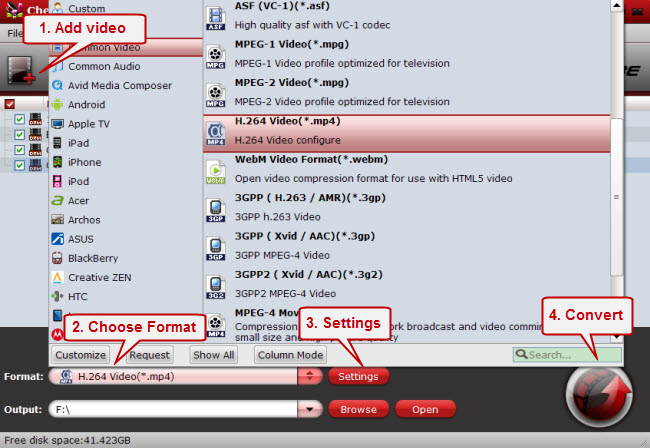
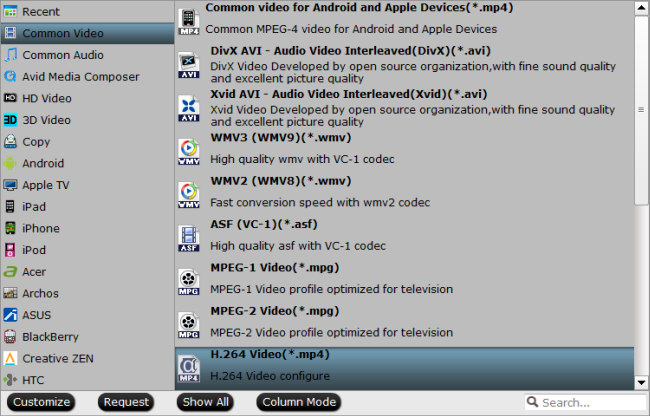
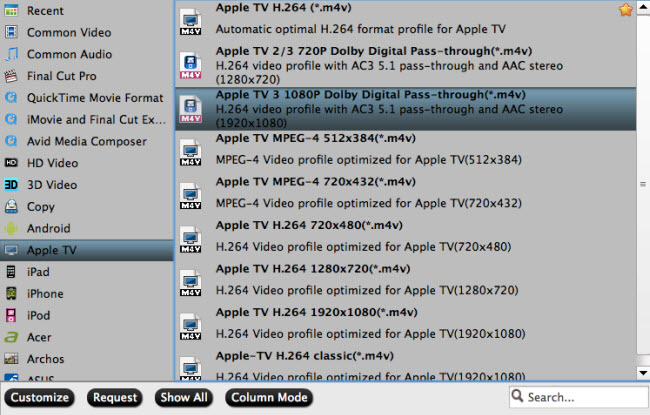
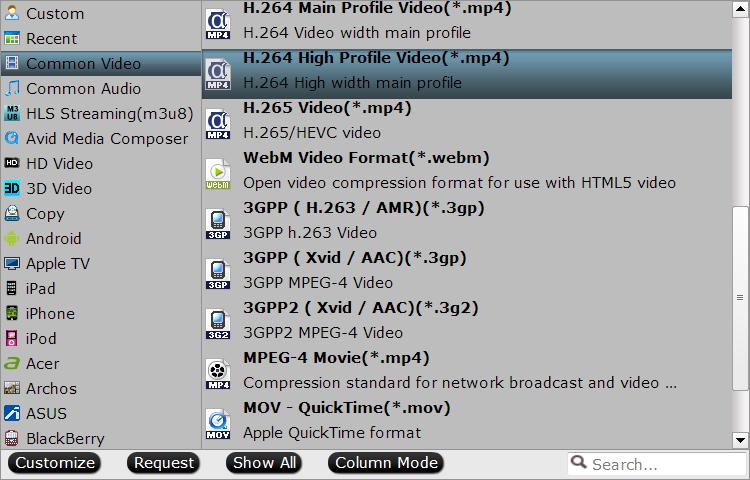
Step 2: Define output file format.
Click "Format" bar, from its drop-down option list, you can select "TVs" profile. Here, it has optimized MP4 format for Sony 4K Ultra HD TV.

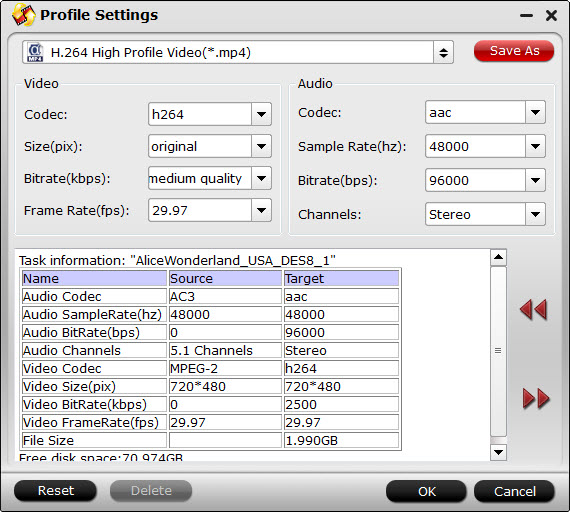
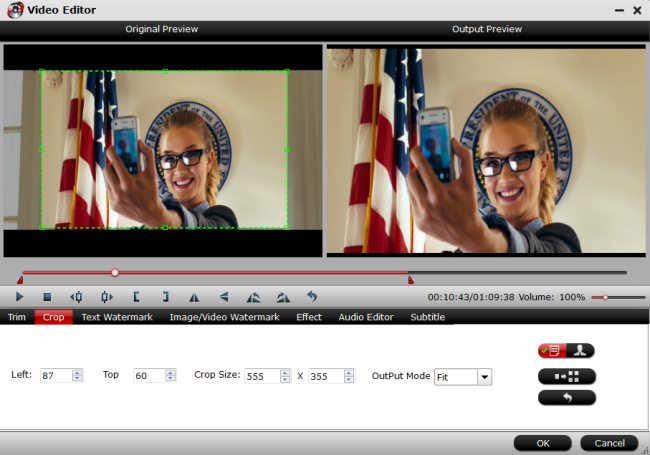
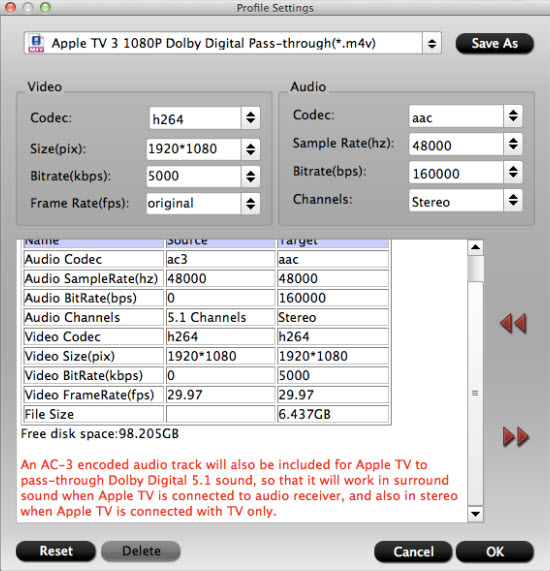
Step 3: Set video parameters
When Sony 4K Ultra HD TV plays videos via USB, it will not support 4K resolution. If your Blu-ray is 4K, you need to downscale 4K to 1080p video in “Settings”.

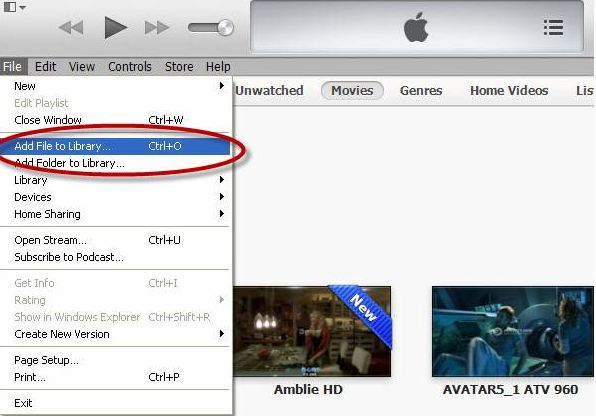
Step 4: Backup Blu-ray to Sony 4K Utra HD TV
After all the settings is done, hit right-bottom "Convert" button to start copying Blu-ray to Sony 4K Utra HD TV. When the process finishes, you can locate the generated MPEG 1 videos in output folder.
When you put the ripped Blu-ray movies to USB flash drive, insert it into USB port on TV, then you can watch Blu-ray on Sony 4K Ultra HD TV via USB.
Related Articles:
- Rip and Backup Blu-ray to Windows Media Player
- Rip and Copy DVD to VLC on Mac OS X with VLC Alternative
- Backup 2D/3D Blu-ray to MP4 for Portable Devices With Handbrake Alternative
- http://www.multipelife.com/backup-blu-ray-dvd-to-drobo.html
- How to Backup Blu-ray Movies from Disc to Disc as a Replica?