MKV is a common format containing multi-track subtitle/audio that the video producer like to use. But sometimes the format can’t be supported by our device So in this case, we need to convert MKV to another format:
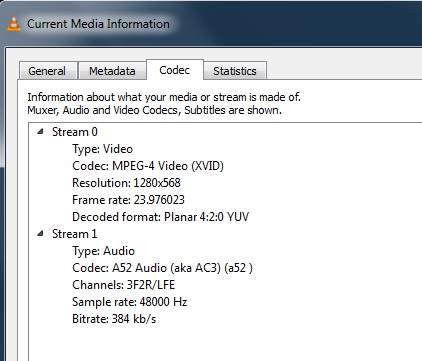
“My PVR will happily play avi wrapper with xvid and ac3 inside. I tried to convert .mkv aac files with freemake and the resultant file will not play on my PVR. Presumably I have to start with the characteristics of the files that play and this is in the picture. How do I make sure that my converted files have the same settings?”
It happened to I met a nice MKV converter several days ago that I used it to convert my MKV file to MP4. And I saw that it has AVI format output. I think I can share my experience here to help the guy.
The software I used is Pavtube Video Converter Ultimate(Review). This app is an all-in-one solution to video conversion including MKV to AVI, MP4, MOV, etc and H.265, MP4, AVI, etc to MKV. I said it is an all-in-one solution because it also can rip Blu-ray//DVD to MKV, AVI, MP4, H.265, M3U8, etc.
If you are a Mac user, you should use Pavtube iMedia Converter for Mac. This program has updated to support MacOS X El Capitan, Yosemite 10.10/10.9 and Mavericks 10.9.
Free download and install


Other Download:
- Pavtube old official address: http://www.pavtube.cn/blu-ray-video-converter-ultimate/
- Cnet Download: http://download.cnet.com/Pavtube-Video-Converter-Ultimate/3000-2194_4-75938564.html
How to Convert MKV AAC to AVI File with XviD Video and AC3 audio?
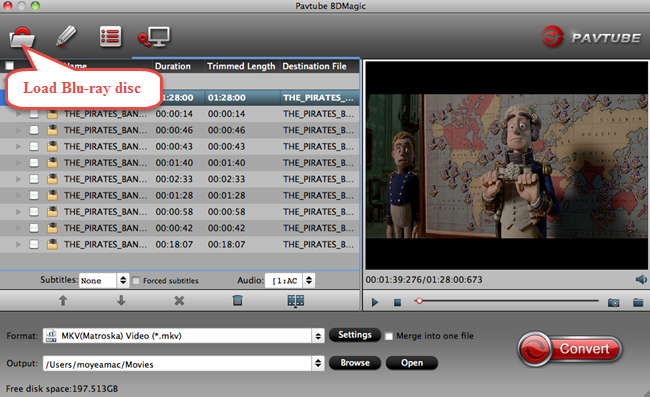
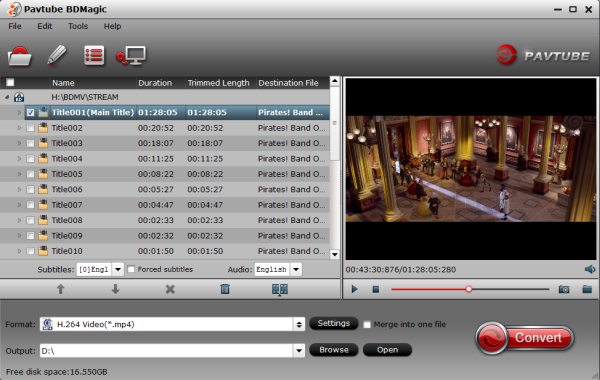
Step 1: Add source video
Open the program, click “File” menu, from its drop-down option, select “Add Video/Audio” to add your MKV AAC file to the program.

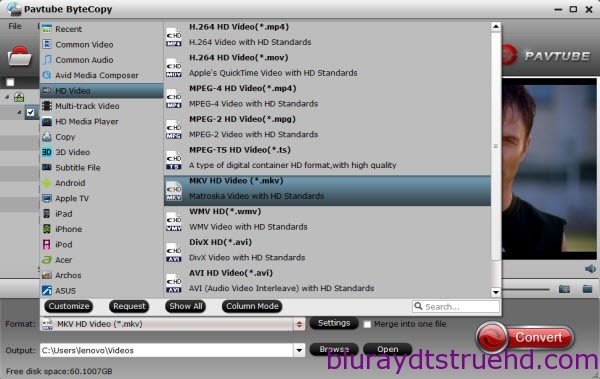
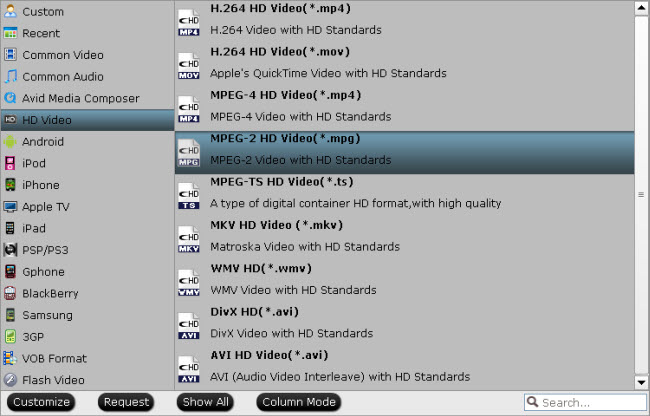
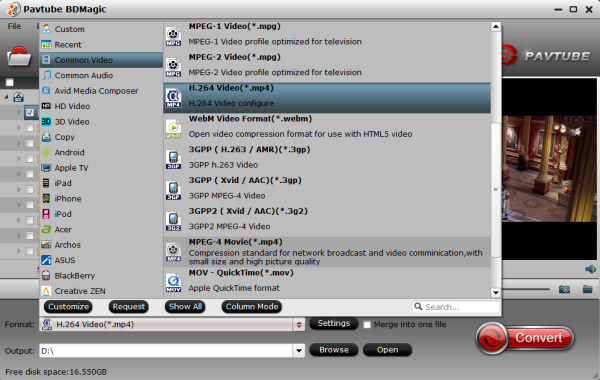
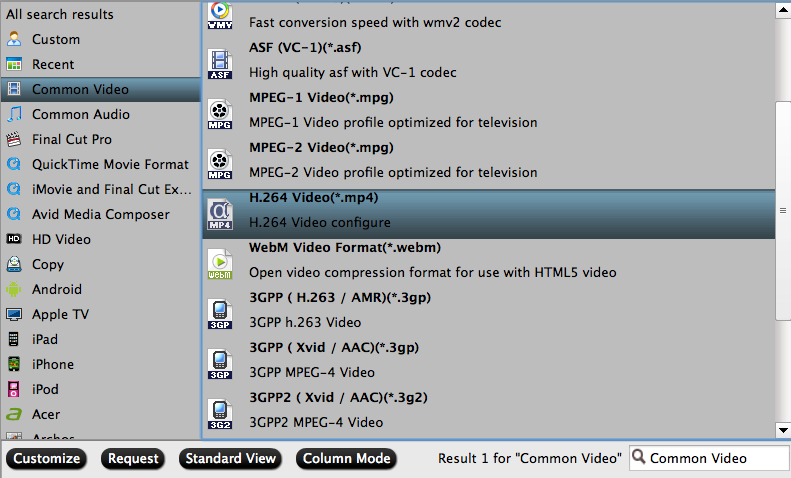
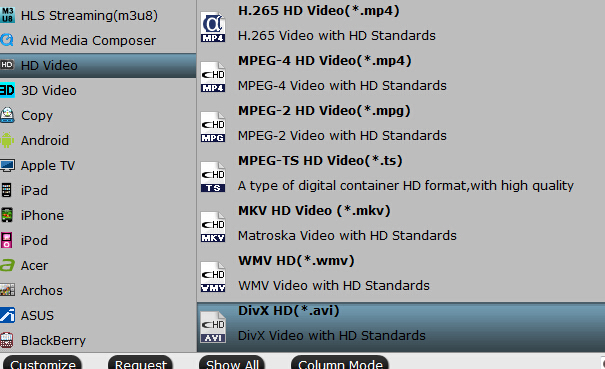
Step 2: Choose output file format.
From “Format” bar drop-down list, choose “HD Video” > “DivX HD (*.avi)” as output file format.
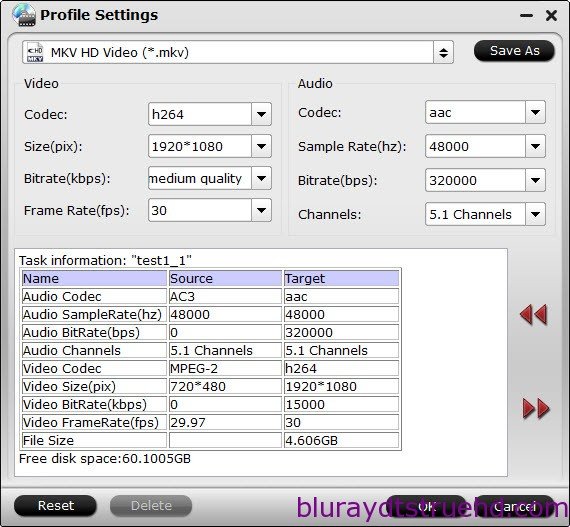
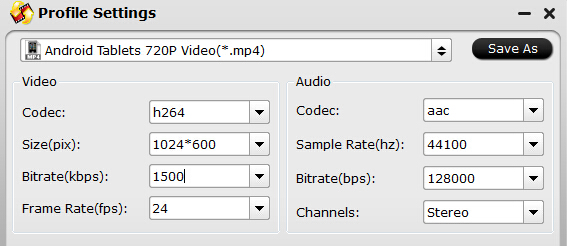
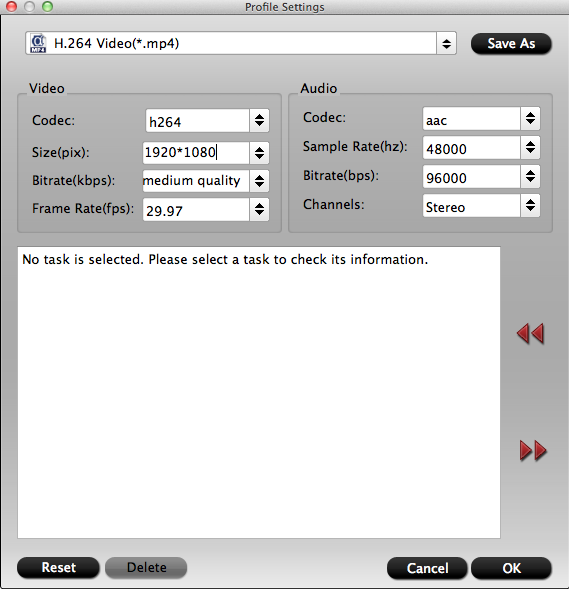
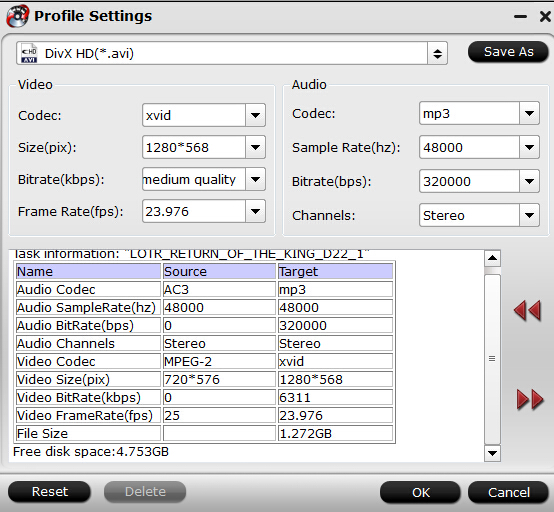
Step 3: Set video parameter
Click on “Settings” to open settings window. Here you can adjust the video settings. According to the picture above and the target need, you can input “1280*568” in size box,, and choose 23.976 in frame rate box. Then do your audio settings in the right list.
Note: AC3 and AVI is not a good combination. If the number of AC3 frames pr. chunk is not supported by the decoder, audio will not play. You must consider to either convert audio to MP3 and keep AVI as container, or to keep audio as AC3 and change container to MP4. Here, I adjust the audio codec as MP3.
Step 4: Start MKV to AVI conversion
When you finish the settings above, click the big “Convert” button to start converting MKV to AVI format. The conversion will be done in a few minutes, which depends on the loaded movie size and the configuration of your PC.
Look, the step is very easy. This software is easy-to-use just like this. I love it and I think you will love it, too.
Related Software:
Video Converter - Convert almost all HD/SD audio/video formats to another.
HD Video Converter - Handle HD digital camcorder footages such as AVCHD (MTS, M2TS), MXF, MOV, etc and convert Tivo and DVR recordings to MP4/DivX/MKV AVI/MPEG/WMV, etc
Related Articles:
“My PVR will happily play avi wrapper with xvid and ac3 inside. I tried to convert .mkv aac files with freemake and the resultant file will not play on my PVR. Presumably I have to start with the characteristics of the files that play and this is in the picture. How do I make sure that my converted files have the same settings?”
It happened to I met a nice MKV converter several days ago that I used it to convert my MKV file to MP4. And I saw that it has AVI format output. I think I can share my experience here to help the guy.
The software I used is Pavtube Video Converter Ultimate(Review). This app is an all-in-one solution to video conversion including MKV to AVI, MP4, MOV, etc and H.265, MP4, AVI, etc to MKV. I said it is an all-in-one solution because it also can rip Blu-ray//DVD to MKV, AVI, MP4, H.265, M3U8, etc.
If you are a Mac user, you should use Pavtube iMedia Converter for Mac. This program has updated to support MacOS X El Capitan, Yosemite 10.10/10.9 and Mavericks 10.9.
Free download and install
Other Download:
- Pavtube old official address: http://www.pavtube.cn/blu-ray-video-converter-ultimate/
- Cnet Download: http://download.cnet.com/Pavtube-Video-Converter-Ultimate/3000-2194_4-75938564.html
How to Convert MKV AAC to AVI File with XviD Video and AC3 audio?
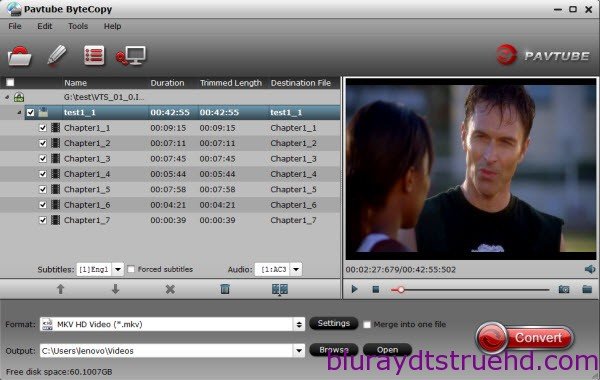
Step 1: Add source video
Open the program, click “File” menu, from its drop-down option, select “Add Video/Audio” to add your MKV AAC file to the program.
Step 2: Choose output file format.
From “Format” bar drop-down list, choose “HD Video” > “DivX HD (*.avi)” as output file format.
Step 3: Set video parameter
Click on “Settings” to open settings window. Here you can adjust the video settings. According to the picture above and the target need, you can input “1280*568” in size box,, and choose 23.976 in frame rate box. Then do your audio settings in the right list.
Note: AC3 and AVI is not a good combination. If the number of AC3 frames pr. chunk is not supported by the decoder, audio will not play. You must consider to either convert audio to MP3 and keep AVI as container, or to keep audio as AC3 and change container to MP4. Here, I adjust the audio codec as MP3.
Step 4: Start MKV to AVI conversion
When you finish the settings above, click the big “Convert” button to start converting MKV to AVI format. The conversion will be done in a few minutes, which depends on the loaded movie size and the configuration of your PC.
Look, the step is very easy. This software is easy-to-use just like this. I love it and I think you will love it, too.
Related Software:
Video Converter - Convert almost all HD/SD audio/video formats to another.
HD Video Converter - Handle HD digital camcorder footages such as AVCHD (MTS, M2TS), MXF, MOV, etc and convert Tivo and DVR recordings to MP4/DivX/MKV AVI/MPEG/WMV, etc
Related Articles: