Wednesday, May 4, 2016

Convert 2D movies to 3D movies on PC/Mac

Are you looking for the best 2D to 3D video converter? Sometimes you just want to watch a 3D movie at home. And maybe with some external help, you can even connect your TV with your computer to enjoy your beloved 3D movies on a big screen. In that case, you need to find the best free 3D video player software for your Mac or PC. Well, let's go find out which one is the best 3D video player you would choose! 

Enjoying 3D life-like stereoscopic video is really perfect, the immersive 3D effect give you totally different experience from that of plain 2D videos. It's a shame that you even don't know how to 2D to 3D MP4 with Ease. Here's how to create 3D movies from 2D videos on PC or Mac. 

Part I: How to Convert 2D to 3D MP4 with Pavtube Video Converter Ultimate/iMedia Converter for Mac 
Part II: More Information about Enjoying 3D Movies 


Part I: Convert 2D to 3D MP4 with easy 3 steps on PC/Mac 

To convert 2D MKV videos to 3D quickly and successfully, here is a good suggestion. Pavtube Video Converter Ultimate (iMedia Converter for Mac) can fulfill this need.you can easily convert 2D movies even those from Blu-ray discs, DVD discs, download from Youtube etc to 3D videos with original quality remained, fast speed while conversion. In addition, it provides powerful editing features like trimming, splitting, cropping, etc to customize movies. 

Learn>>Convert your 2D movies to 3D movies on PC/Mac 

Download the 2D to 3D Converter here; follow the detailed guide below to see how to convert 2D movies to SBS 3D MP4 video step by step. Here, take example for windows users. 

Step 1. Load 2D Movies sources. 

Click the top left disc&folder icon to import 2D videos or Blu-ray/DVD discs. Most main stream video formats are supported, such as MKV/MOV/AVI/WMV/Tivo/VOB/MPG. It will also help you to roll off your disc protection as well as region code easily. 


Step 2. Choose format. 

Click the "Format" drop-down list and choose "3D Video -> MP4 Side-by-Side 3D Video (*.mp4)" or “MKV Side-by-Side 3D Video (*.mkv)" as the best preset for windows. It also suitable for any portable devices which you want to put. 

Note: To learn more about the differences between Anaglyph 3D and Side-by-Side 3D, you can click the link for more info. 

Step 3. Adjust conversion specs and 3D effect (Optional). 

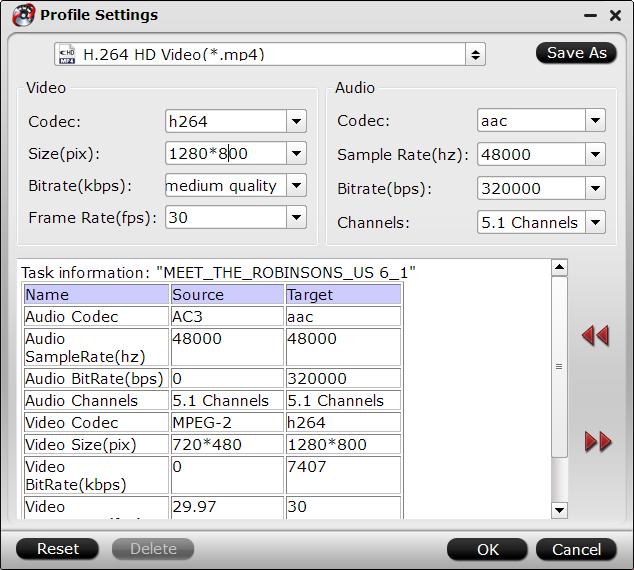
Click "Settings" to enter the Profile Settings window; you can free change video size, bitrate (turn it down if you want to videos in smaller file size) and frame rate. 

Step 4. Start conversion. 

Now back to the main interface and hit "Convert" to start the conversion. Wait for moments till the conversion completed, then click "Open output folder" to quick locate converted SBS 3D MP4 videos for enjoy your fantastic 2D movies with 3D effects anytime as you want. 

Part II: More Information about Playing 3D Movies 

How to play a 3D video? 

If you want to know more 3D Video Players for PC, Review this guide

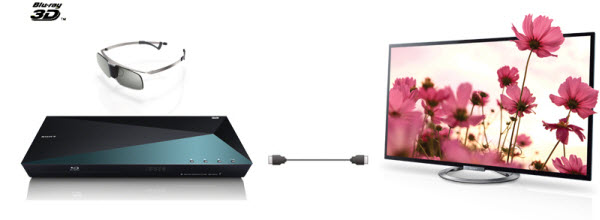
You can play a 3D video on different devices: 3D TV, old 2D TV with 3D glasses, mobile phones that support playing 3D movies like LG and HTC mobile phones or Mac/PC with 3D player. 

What’s more? you can also convert 3D Blu-ray to 3D MP4 and play on your 3D players with desired subtitles. 

More 
Solution - Convert and Play downloaded 3D Movies on TV 
Amazon Studios may be gearing up to make its own original VR content 
Watch 3D Movies with Epson PowerLite Home Cinema 
2016 Top 5 3D Blu-ray Movie Converter Review 

Monday, May 2, 2016

Solution - Convert and Play downloaded 3D Movies on TV

Solution - Convert and Play downloaded 3D Movies on TV 
 
Here is the best solution to convert downloaded 3D Movies to SBS 3D MP4 for enjoying the 3D videos with the assistant of the Pavtube 3D Video Converter Ultimate on 3D TV.

3D technology has come into our life, more and more 3D movie fans would rather stay at home to enjoy the fantastic 3D movies on 3D TV. Few people already know how to achieve it. Wondering if anyone can possibly provide you with a little insight of what are you thinking here? Hold on reading...

How can you take a movie that downloaded from Youtube or other websites and transform it into a 3D experience? Here are many different video formats you have, just like: MKV, AVI, ISO, WMV, FLV, MTS, M2TS, TS, etc. All of them can not be played 3D TV. So, you need to convert downloaded 3D movies to 3D TV supported format as Side-by-Side 3D MP4. Are you trying to find out the answer? Self-help is better than help from others! How wonderful it will be if we can enjoy 3D movies on 3D TV by ourselves.

Thanks to a variety of very cool Pavtube 3D Video Converter Ultimate, it helped lots of 3D movie fans and very easy to use. It not only for Create 3D movies out of 2D sources, but also can create 3D movies out of source 3D Blu-ray content in 5 different 3D video formats: MKV, MP4, MOV, WMV and AVI for multiple 3D media players like HTC EVO 3D, LG Optimus 3D P920, 3D HDTV, 3D game consoles, etc.

Step 1. Load the downloaded 3D video files.

Launch the 3D movies Converter on PC, and click “Add Video” button to load your favorite 3D movies(MKV, MOV, AVI, ISO, MTS, M4V, FLV, etc). Mac users can try a Mac 3D Video Converter. Besides,It allows you complete 3D to 3D Blu-ray conversion by ripping 3D Blu-ray discsand DVD discs to different brands of TVs, mobile devices, media players, editing software, etc. 


Step 2. Set 3D MP4 format as output.

Click "Format" bar and move mouse to "3D Video" column, you can choose "MP4 Side-by-Side 3D Video (*.mp4)" as output format. See also: Differences Between Anaglyph 3D and Side-by-Side 3D.


Step 3. You can adjust target video settings and 3D effect.

Click “Settings” which is next to “Format”, free change your target video size, bitrate, frame rate and 3D depth. If you want to get best video quality, pls switch them to “original”.


Step 4. Start rip 3D movies to SBS MP4 3D.

When everything is OK, just press the "Convert" button to start the conversion. It will not take much time. Just wait for the conversion process to get done. Once the conversion finished, you are able to get 3D SBS MP4 files via clicking "Open" button.
Enjoy your new 3D TV and the fun of creating content to watch on it!

If you like enjoying 3D movies on big screen and collected lots of 3D Blu-ray discs, you can playing them on Panasonic Viera TC-P65VT60 TV orPlayStation 4 and other 3D TV as you want. (Review:Top 5 3D Blu-ray Movie Converter Review).


More
Amazon Studios may be gearing up to make its own original VR content
Watch 3D Movies with Epson PowerLite Home Cinema
2016 Top 5 3D Blu-ray Movie Converter Review
Put DVD on Lenovo Yoga Tablet 2 (Android) 

Wednesday, April 27, 2016

Amazon Studios may be gearing up to make its own original VR content

Over the past few years Amazon has established itself as home to both quality television shows and movies, and according to a recent report the company is now setting its sights on virtual reality. According to The Wrap, the company's creative production arm, Amazon Studios, is talking with multiple companies about producing original VR content. 

While details are slim and the discussions are characterized as being in the "early stages," the move certainly makes sense. With VR headsets finally landing in the hands of consumers this year, it's rapidly becoming clear that the games and narrative experiences people have with the devices will determine the success of the medium more than just hardware specs or capabilities. If Amazon wants in on what many consider to be the next great frontier in original entertainment, it will have to start experimenting with creating that kind of content. 

Amazon seems to recognize VR as a long-term opportunity 

The report follows less than two months after a job listing revealed that Amazon was assembling a VR team tasked with creating a "platform and interface for immersive storytelling." That listing pointed more towards the software infrastructure needed to create an Amazon Video VR experience, not dissimilar to the approaches that Netflix and Hulu are experimenting with. But focusing on creating its own original VR experiences under the Amazon Studios banner would be an indication that Amazon sees VR not as a short-term gimmick or box to check, but a long-term opportunity that can only be fully taken advantage of with the combined forces of both its technological and creative teams.

Watch 3D Movies with Epson PowerLite Home Cinema

I was one of the earliest adopters of the whole home cinema projector idea. I inherited what was at the time a $5000 state of the art Epson machine in 1999. We bought it for our dot com start-up. Afterwards I took it home and bought a screen. I figured out how to connect it to my cable and surround sound and it has worked great for nearly 15 years. recently it just died - I think it was the fan blades. 


So it was time to upgrade. I was all excited to find out I could replace it for as little as $400-$500 bucks. But then I found out there was a big divide between office powerpoint projectors and home cinema. When I originaly bought mine there was no difference. The guy at Office Depot told me that if I wanted it for movies that I'd be better off going to Best buy. I went to Best Buy and they only had like three choices in Home Cinema. I had rapidly figured out that in order to get true HD - i.e.. 1080 P the cost was like $1500 on up - ugh! I didn't want to spend that much. So I went on a crusade to find a 1080 P HD projector for under $1000 so I naturally went to Amazon. I read all kinds of reviews and went to sites like [...] which was very helpful. I finally narrowed it down to four all found on Amazon and studied at Projector Central:
  • Optoma HD25 $949
  • BenQ W1070 $884
  • Mitsubishi HC 4000 $949
  • Acer H6510BD $740


These were all very highly rated. I was really tempted to get the Acer for the price but the machine did not seem to be compatible with as many formats as the others. I was really torn and couldn't decide. Then I read about the brand new machine from Epson - the 2030 with full HD 1080 P and it was and LCD not DLP like all the others and most people I spoke with seem to think LCD is superior. It even is 3D capable and even though I don't watch 3D movies yet I figured it couldn't hurt to have the latest technology. Plus after 15 successful years with Epson I wanted to stick with the brand. In fact I really wanted to buy the 2000 (not the 2030) which is the internet version and retails for only $899 instead of $999. But it wasn't available and I needed a replacement of my broken machine. But even at $999 this was significantly cheaper than other Epson machines and it is clearly seen as a superior brand in this category which they basically invented. If you can get the 2000 for $899 that is the way to go as the specs are nearly identical. 


My expectations were high on what the image would be like but they were met in spades. The quality is truly crystal clear sharp like HD television. The one criticism is that the projector's zoom is too good. By that I mean it can project to an enormous image. But since I only have an 80 inch screen and I am using this in a 15 foot room it created a little problem for me. My old projector needed to be quite a distance away to fill the scrren, but the new projectors are much more powerful in terms of zoom. 


To get it to fit my screen properly, the projector needed to be only about 6-8 feet from the screen. This is a little bit of a pain because I wanted to put it in the cabinet at the back of my room. But from 15 feet or so it can't make an image of "only" 80 inches. In fact at that distance its close to twice as big. I've sorted this out but you may want to study the dimensions of your room and where your wires are. There are projectors know as "short throw". This may be the way to go but you will have to study this further. If you do a google search or check out the manufacturer's site you can find out the distance need to create x sized image. Basically there is a manual zoom on the projector like on binoculars - this can only do so much up or down the rest is accomplished by distance. The further away you are the bigger the image - the closer the smaller. 

Overall I am very pleased and I'm definitely keeping this machine. Its functionality and menus are far superior to my old machine and it is really easy to work with. Movies are awesome and so is football. I'm totally satisfied. 

The PowerLite Home Cinema 2030 is a very affordable, compact, and stylish looking 2D/3D video projector from Epson that utilizes 3LCD technology as a foundation to provide 1080p native resolution, further supported by strong B/W and Color light output, and up to a long 5,000 hour lamp life in standard operating mode. 
How to use Epson PowerLite Home Cinema 2030 3LCD Projector to watch 3D Movie 

Projector Placement: The Epson PowerLite Home Cinema 2030 is pretty is easy to place and set up. 

Step 1: Install a screen (size of your choosing) or use a white wall to project on. 

Step 2: Place projector on a table/rack or on the ceiling, either in front or rear of the screen at the distance from the screen that works best. Epson's screen distance calculator is a great help. For review purposes, I placed the projector on a mobile rack in front of the screen for easier use for this review. 

Step 3: Connect your source. The 2030 provides wired connectivity (HDMI, HDMI-MHL, component, composite, VGA, USB), but also allows an additional wireless LAN connectivity option via optional Wireless USB WiFi Adapter. 

Step 4: Turn on the source device that you plan to use - The 2030 will then automatically search for the active input source. You can also access the source manually via the remote control or use the onboard controls located on the side of the projector. 

Step 5: Once you turn everything on, you will see the screen light up, and the first image you will see is the Epson logo, followed by an message that the projector is searching an active input source. 

Step 5: Adjust the projected image. To fit the image onto the screen, raise or lower the front of the projector using the adjustable foot located on the front center bottom of the projector. You can further adjust the horizontal and vertical image placement using the Horizontal Keystone Correction slider located on the top of the projector, behind the lens, and/or Vertical Keystone Correction function accessible via the projector's menu system. 

Next, use the manual Zoom control located above and behind the lens to get the image to fill the screen properly. Once all the above procedures have been done, use the manual Focus control to fine tune the image appearance and also select the Aspect Ratio you desire.Video Performance 

The Epson PowerLite Home Cinema 2030 performs well, especially with HD sources, such as Blu-ray Discs. In 2D, color was very good, flesh tones were consistent, and both black level and shadow detail were more than acceptable, although not as deep and inky as higher-end projector would be able to provide. 

The 2030 can also project a viewable image in a room that may have some ambient light present, which is often encountered in a typical living room. Although there is a compromised in terms of contrast and black level in order to provide a sufficiently bright image in such a situation, the projected image do not look overly washed out until you turn on room lights. 

On the other hand, when the lights are off, or the room has very little ambient light, that is more typical of a home theater viewing environment, running the 2030 in ECO mode (for 2D viewing) still projects plenty of light to produce an excellent cinema-like image on fairly large screen sizes (my main screen was 100-inches).Deinterlacing and Upscaling of Standard Definition Material 

To further check the 2030's video processing performance, I conducted a series of tests using Silicon Optix (IDT) HQV Benchmark DVD (ver 1.4). 

Here the 2030 passed most of the tests, but did have trouble with some. There were inconsistencies in detecting some of less common frame cadences, and although it passed most of the deinterlacing tests with flying colors, it was just fair on one of the basic tests. Also, although detail enhancement looked good from standard definition sources connected via the HDMI, the 2030 did not enhance detail as well with sources connected via the composite video input. 

More 
2016 Top 5 3D Blu-ray Movie Converter Review 
Put DVD on Lenovo Yoga Tablet 2 (Android) 
Play DVD Movies on iPad Pro 9.7 Successfully 

Monday, April 25, 2016

2016 Top 5 3D Blu-ray Movie Converter Review

3D video is more and more popular in our entertainment and we prefer to watch the 3D film rather than 2D film in the cinema. 3D video can make us have an immersed sense, which is the main reason why most people like watch the 3D film. And with the newest TV which has the 3D function, we can easily enjoy the 3D video at home. 


If you are a movie lover and have tons of 3D Blu-ray discs, you may need a Blu-ray ripping program to make digital backups of your 3D Blu-ray collection in 3D format, so that you can watch them on 3D TV or 3D players with ease. As a matter of fact, there are many 3D Blu-ray Ripper programs out there. For the purpose of figuring out the top 3D Blu-ray Ripper in 2014-2015, we evaluated a lot, and now we present the results basing on our test. 

Also seeTop 5 3D Blu-ray Movie Converter Review 2016 

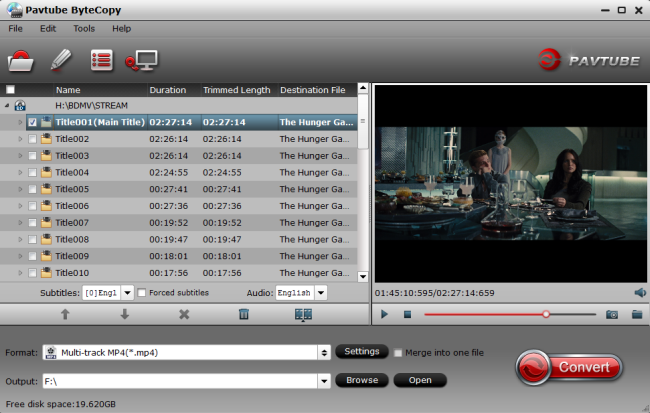
No. 1 Pavtube ByteCopy – Perfect 

Price: $42  


Features

Pavtube ByteCopy is your best Blu-ray & DVD copying and backing up tool which can backup and convert latest Blu-ray and DVD movies to any other formats like MP4, MOV , M4V, AVI, WMV, MPG, MKV, etc or MP4/MOV with multi-track audios for playback and it is also able toencode Blu-ray movies and DVDs to MKV container format with preserving chapter markers, multiple audio tracks and subtitles. And you can create 3D video from your 3D Blu-ray discs. 

The Mac version is ByteCopy for Mac

The bad: Not found. 

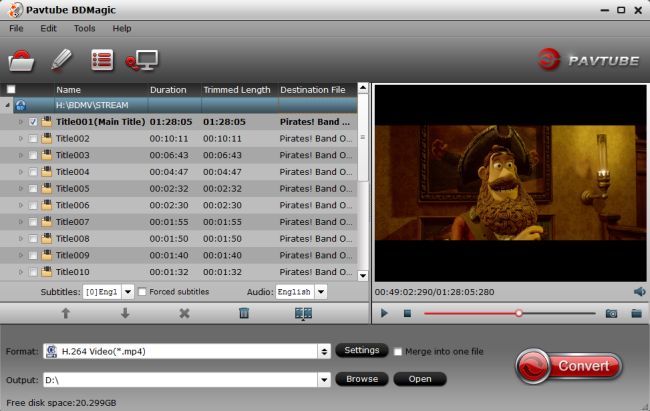
No. 2 Pavtube BDMagic – Excellent 

Price: $34.3 now  


Features

Not any other Blu-ray Ripper can do with all kinds of BD/DVD sources like BDMagic: protected and unprotected Blu-ray Disc, BDMV folder, BD ISO, physical DVD, VIDEO_TS folder, DVD ISO and IFO file. Pavtube BDMagic supports Blu-ray conversion to popular device formats with pretty much indistinguishable image quality from the original Blu-ray Disc with Dolby Digital 5.1/AAC 5.1 audio keeping. 

Besides that, using the “Full Disc Copy” feature, you can copy Blu-ray/DVD’s original file structure to BDMV/Video_TS folder with all subs tracks, audio streams and chapter information included and also save 100% intact M2TS/VOB main movie from your Blu-ray/DVD Disc without any quality loss.

What's more, it also rips 2D/3D Blu-ray into 3D Videos in MKV/MP4/MOV/WMV/AVI with Side-by-Side, Top-Bottom, or Anaglyph (Red-Blue). 

The bad: Although the interface is easy to understant, it need to be improved. 

The Mac version is BDMagic for Mac

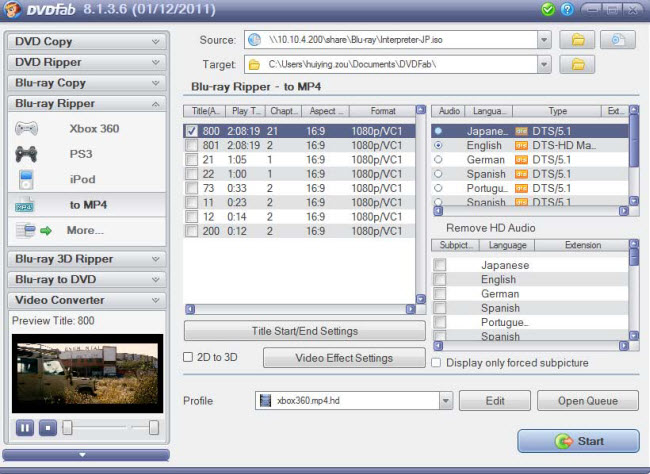
No. 3 DVDfab Blu-ray Ripper – Good 

Price: $60  


Features

When it comes to decrypting/hacking Blu-ray discs and DVDs, DVDfab is about as good as it gets. DVDfab Blu-ray Ripper well deserves its high reputation in decryption, and it handles not only AACS, BD+, Region code restriction, but also Cinavia protected Blu-rays. DVDFab Blu-ray Ripper (3D Plus) is able to rip any 2D Blu-rays and 3D Blu-rays to various 2D and 3D videos, in specific video formats for playback on specific display devices. 

The bad: It is lacking of DVD ripping feature. The interface is not very intuitive. And DVDfab Blu-ray Ripper costs more than its alternatives. 

No. 4 Leawo Blu-ray Ripper – Fair 

Price: $44.95 


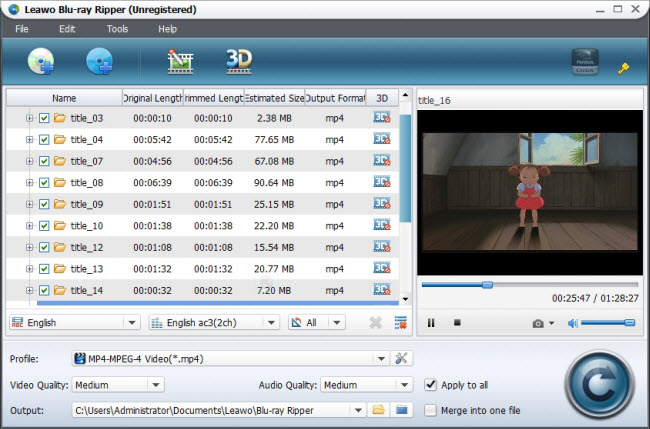
Features: Leawo Blu-ray Ripper comes with the popular feature to convert 2D to 3D for users to enjoy the popular 3D effect and exports various HD and popular common video formats (M2TS, AVI, MP4, WMV, FLV, MPEG, MOV, MKV, RMVB, etc). Leawo Blu-ray Ripper has stunning trim and crop feature- it trims movie more accurate and crops video more considerate than its competitors. It can load multiple Blu-ray and DVD movies at a time. If you have tons of movies waiting to rip and feel like having a Blu-ray Ripper queue them several movies for running overnight, Leawo is recommended. 

The bad: Not recognizing Blu-ray ISO or forced subtitle (if there is). GPU encoding is restricted to Nvidia's CUDA only. There's no backup option for keeping original movie quality. 

No. 5 Xilisoft Blu-ray Ripper – Poor 

Price: $49.95 


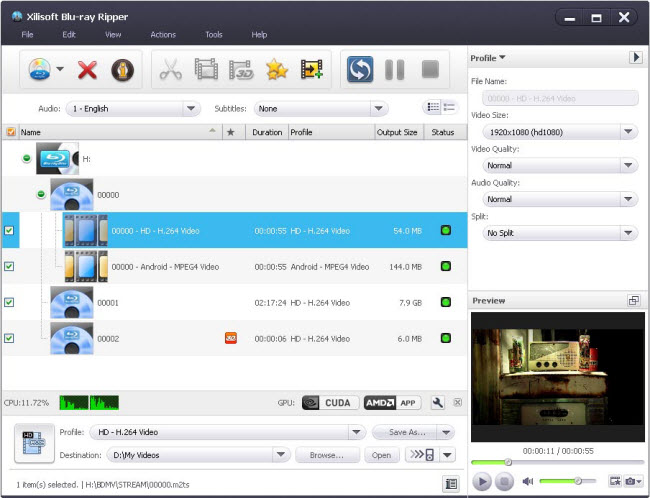
Features: Xilisoft Blu-ray Ripper can convert both standard Blu-ray videos and 3D Blu-ray videos to SD and HD video formats such as MKV, AVI, WMV, TS, etc. And it can preserve 3D effects when your source is 3D Blu-ray movie. NVIDIA CUDA and AMD APP graphic acceleration technology has been introduced to bring faster conversion experience. 

The bad: The app does not decrypt Blu-ray protections and requires AnyDVD HD to be installed in advance for Blu-ray ripping. Not compatible with latest Windows 8 and Windows 8.1. DVD ripping is not supported. 
Conclusion: 


Additional Tip: 

If you get 3D Blu-ray, 2D Blu-ray, DVD as well as some MKV, FLV, M4V, WMV, MOV, AVI, Tivo, XAVC, M2TS etc. videos, and have trouble to play them on 3D devices and 3D players, you’re in the right place. Get Pavtube Video Converter Ultimate - an all-in-one powerful converting tool to transcode 2D/3D Blu-ray, standard DVD and SD/HD Video files to playable 2D or 3D format with the best video/audio parameter settings. Download this software and try it out now! 


After review this article, you can choose a best 3D Blu-ray conversion program. Just enjoy your 3D Blu-ray movies on your 3D devices as your like. Have fun! 

More 
Put DVD on Lenovo Yoga Tablet 2 (Android) 
Copy Blu-ray/DVD to Asus ZenPad 8.0 2 
Play DVD Movies on iPad Pro 9.7 Successfully

Friday, April 8, 2016

Put DVD on Lenovo Yoga Tablet 2 (Android)

The Lenovo Yoga Tablet 2’s full HD display and unique design are rarities in this price range, making it a great choice for entry-level Android tablets. With support for playback of video up to 1080P and the large screen display, Lenovo Yoga Tablet 2 is absolutely a great portable device for watching movies on the go. However, Lenovo Yoga Tablet 2 both Android and Windows version, is short of a DVD drive to play DVD movies. Then how to watch DVD movies on Yoga Tablet 2? It’s still a mystery. Hold on...


I’m the a user who have the same trouble. Searching available ways to put DVD to Lenovo Yoga 2 Tablet online, I got some clues. As some guys suggest,  we can use MX Player on Yoga Tablet 2 to play DVD movies. I tried it, but problems occurred- only video no audio. So, it doesn’t seems to work. Another common and practical method is to convert DVD to Lenovo Yoga Tablet 2 more friendly format like MP4. After multiple testing, I got a big success based on the help from Pavtube DVDAid, one of the best DVD Ripper for Lenovo Yoga Tablet 2. 

With it, you can easily rip DVD to Lenovo Yoga Tablet 2 8, Yoga Tablet 2 10, Yoga Tablet 2 Pro supported video format with fast speed and excellent output quality. In addition, this DVD ripping tool can convert DVD to various popular video formats like AVI, MP4, WMV, MPEG, MOV, FLV, MKV, 3GP... Besides, it also supports ripping DVD to Android, iOS, Windows based devices optimized video for playback on Any portable devices. Read the review

If you are a Mac user, you can turn to Pavtube DVDAid for Mac (Yosemite included). (Now, you can get 50% OFF discount after liked our FaceBook.) 

How to Copy a DVD to Lenovo Yoga Tablet 2 with Supported Video 

Step 1. Load your DVD movies 

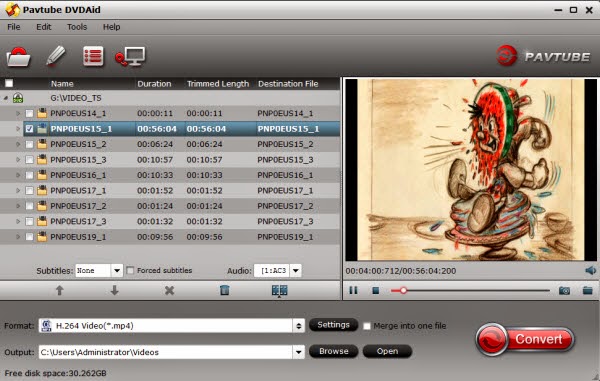
Launch the program and click Load DVD: Load DVD Folder, Load ISO Files or Load IFO files to import the DVD movies you want to rip. As you see, all added files will be listed below and you can preview them, take snapshots, choose subtitle and audio track, etc. as you like. 


Step 2. Select output video format

To put and play DVD on Lenovo Yoga Tablet 2, you are advised to choose MP4 output format. Click on the pull down menu of Format > Common Video, and you can select H.264 MP4, MPEG-4 as the output format. 


Tip: if you like, you can click on settings you could easily set bitrate, frame rate, codec, channels, sample rate, etc to adjust parameters that affect video quality and file size for the video you prefer. keep in mind that bitrate higher results in big file size, and lower visible quality loss, and vice versa.

Step 3. Start to convert DVD to Lenovo Yoga Tablet 2

When you have finished all the above settings, you can simply click the Convert button on the main interface and let the software do the DVD to Lenovo Yoga Tablet 2 conversion for you. After the conversion, click "Open" to locate the converted video files and then transfer them to your Lenovo Yoga Tablet 2 for watching on the go with ease. 

Src: Simple way to Play DVD on Lenovo Yoga Tablet 2 (Android)

Related Articles:

Wednesday, April 6, 2016

Copy Blu-ray/DVD to Asus ZenPad 8.0 2

A new second generation Asus ZenPad 8.0 2 model is coming. One of the main changes with the new Asus ZenPad 8.0 2 (Z380M) is that it will launch with Android 6.0 Marshmallow. The Asus ZenPad 8.0 is a HD tablet that should not be confused with the Asus ZenPad S 8.0 retina tablet though, even if they are both 8-inch Android tablets with very similar names.


When you have the Asus ZenPad 8.0 2, you may want to freely play videos and movies with your families and friends. However, it is very difficult to play Blu-ray and DVD movies on Asus ZenPad 8.0 2, because Asus ZenPad 8.0 2 has not the DVD drive. No worry, here will tell you how to put Blu-ray and DVD movies onto Asus ZenPad 8.0 2 quickly.

To successfully watch DVD.Blu-ray movies on Asus ZenPad 8.0 2, a DVD/Blu-ray ripping program is needed. The recommended Blu-ray/DVD to Asus ZenPad 8.0 2 Converter is Pavtube ByteCopy for Windows/Mac. It can effortlessly change Blu-ray/DVD to Asus ZenPad 8.0 2 supported video format with fast speed and excellent output quality. In addition, this DVD/Blu-ray ripping tool can also convert DVD/Blu-ray to various popular video formats like AVI, MP4, WMV, MPEG, MOV, FLV, MKV, 3GP, etc. as well as rip Blu-ray/DVD to optimized video for playback on iPad, iPod, iPhone, Zune, Creative Zen, Archos, iRiver, Blackberry, Xbox 360, Apple TV and more.

Free download and install:
          

Other Download:
- Pavtube old official address: http://www.pavtube.cn/bytecopy/
- Cnet Download: http://download.cnet.com/Pavtube-ByteCopy/3000-7970_4-76158512.html

How to Copy and Put Blu-ray/DVD to Asus ZenPad 8.0 2?

Step 1: Add Blu-ray/DVD video file.

Insert Blu-ray or DVD into its optical drive. Launch the program, click "File" > "Load from disc" button to load Blu-ray/DVD disc into the program. When both Blu-ray or DVD disc exists, the program will load DVD disc first. You can choose desired subtitle or keep forced subtitle at the bottom of the chapter list. 


Step 2: Choose output file format.

Click "Format" drop-down bar, scroll down the menu on the left, go to select Asus ZenPad 8.0 2 playable formats such as "HD Video" > "H.264 HD Video(*.mp4)" or other accepted formats like AVI, WMV, MPEG, etc.


Tip: To maximize output video quality, you can adjust the output file resolution to be compatible with the display screen resolution of your final device. Click Settings then choose the video size you want. Lower video size can make you watch movies on Asus ZenPad 8.0 2 for longer time. 


Step 3: Convert Blu-ray/DVD to Asus ZenPad 8.0 2.

Go back to the main interface, hit right-bottom "Convert" button to start Blu-ray/DVD to Asus ZenPad 8.0 2 MP4 format for smooth playback.
When the conversion is completed, hit the "Open Output Folder" button to open out folder with the converted files. Then you can transfer converted files to Asus ZenPad 8.0 2 for watching anytime and anywhere. 

Related Software
Pavtube Video Converter Ultimate for Windows/Mac - Function of converting any 4K/SD/HD video in MKV, FLV, MP4, WMV, MOV, Tivo, WebM, etc video to another digital file you need. Then you can play your source video on iPhone SE, iPhone 7, iPad Pro 9.7, iPad Air 3, iPad Mini 4, Sony Xperia X, Lenovo Tab 2 A8/A10, Blackberry, PS3, PS4, LG 4K TV, etc. 

Want to save money? Get the software bundles
ByteCopy($42) + Video Converter Ultimate($65) = Only $79.9, Save $27.1