Hot Search: DVD to Fire Kids Edition | “The Croods Blu-ray” to Kindle | Blu-ray on Kindle Fire HD
Amazon has also updated its Fire, Fire HD 8 and HD 10 , 8-inch and 10-inch tablet with HD resolution (1280 x 800 pixels, 400 nits) and quad MediaTek-core 1.5GHz. The smallest model will be available with storage of 8GB and 16GB , while the 10-inch will be equipped with 16GB or 32GB of interior space. Both will support microSD cards up to 128GB. We also report on board 1GB of RAM, IPS display with good viewing angles and Fire OS 5 operating system based on Android 5.1 and with a revamped user interface. Amazon does not provide data on the battery, but should provide at least 8 hours of battery life.
So, for watching the MKV, AVI, VOB, FLV, Tivo, WMV format video on Amazon Fire HD 10/8, we should know the format Amazon Fire HD 10/8 supported.
Amazon has listed the supported file formats clearly. Please check directly below:
Audio formats supported by Kindle Fire tablets: AAC, MP3, MIDI, OGG, WAV
Video formats supported by Kindle Fire tablets: MP4, VP8, 3GP, WebM, M4V, 3G2
According to the format supported by Amazon Fire HD 10/8, we know that all the MKV, AVI, VOB, FLV, Tivo, WMV format video are not in the list above. In other words, we couldn’t play the MKV, AVI, VOB, FLV, Tivo, WMV on Amazon Fire HD 10/8 directly. There you should get a helping hand from a video converter--Pavtube Video Converter. This program allows you to convert video types such as SD videos, HD footages from camcorders and TiVo/DVR recordings to almost any audio/video format for free entertainment on mobile devices, HD media players, as well as free access to video editing software.
You can also realize your movie director dream with the built-in video editor. Make your personal video by trimming, cropping, adding text/image/video images, inserting SRT/ASS/SSA subtitle into source video, etc.
What is worth mentioning, batch conversion and GPU acceleration can largely save your energy and time.
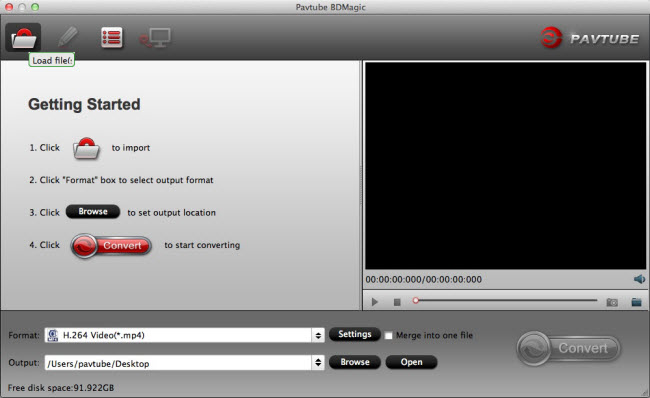
If you are a Mac user, the Mac version is also available here for you--Pavtube Video Converter for Mac


Other Download:
- Pavtube old official address: http://www.pavtube.com/video_converter/
- Amazon Download: http://download.cnet.com/Pavtube-Video-Converter/3000-2194_4-75734821.html
- Cnet Download: http://download.cnet.com/Pavtube-Video-Converter/3000-2194_4-75734821.html


Other Download:
- Pavtube old official address: http://www.pavtube.com/video-converter-mac/
- Amazon Store Download: http://www.amazon.com/Pavtube-Video-Converter-Mac-Download/dp/B00QIBK0TQ
- Cnet Download: http://download.cnet.com/Pavtube-Video-Converter/3000-2194_4-76179460.html
[size=4]How to Play MKV, AVI, VOB, FLV, Tivo, WMV Format Video on Amazon Fire HD 10/8
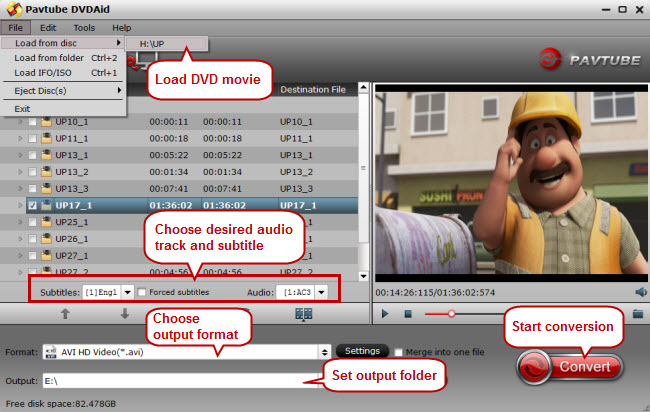
Step 1. Load Files.
Free download the program and install with the instructions followed, and import your files with click ‘Load from folder’.
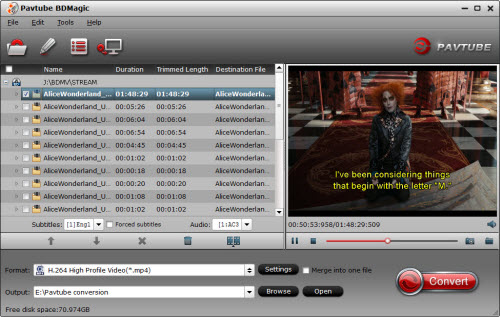
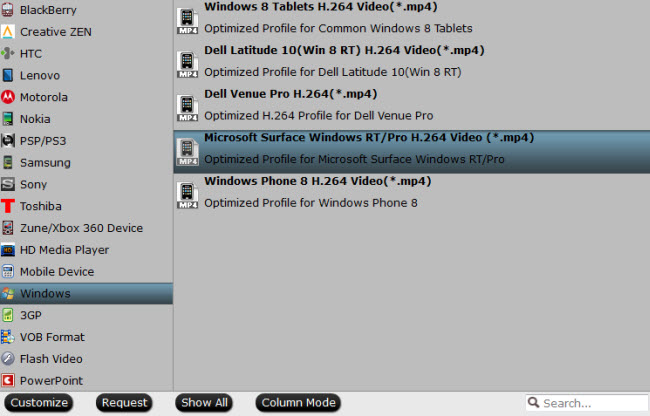
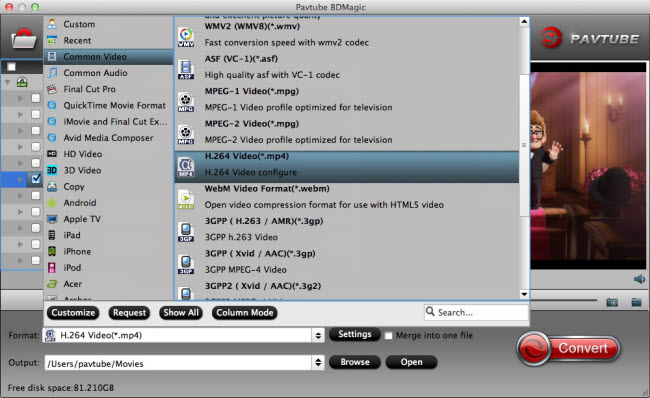
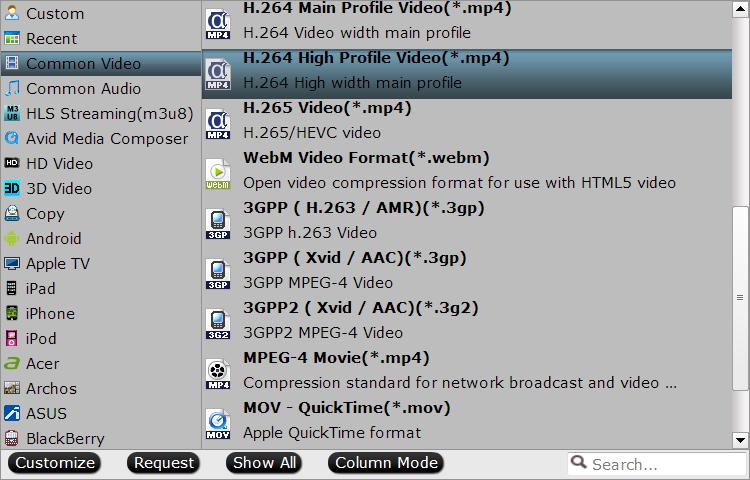
Step 2. Select output profile format.
No worries about looking for the output formats for Kindle Fire HD Kids Edition here, go to the ‘Format’ list for the item ‘Android’ >> Amazon Kindle Fire HD (*.mp4)’ as the best format. It can be watched smoothly on this tablet.

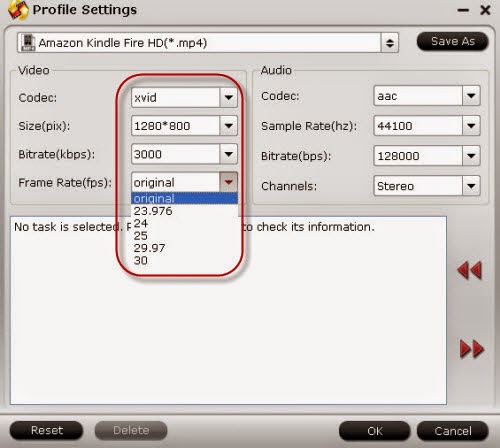
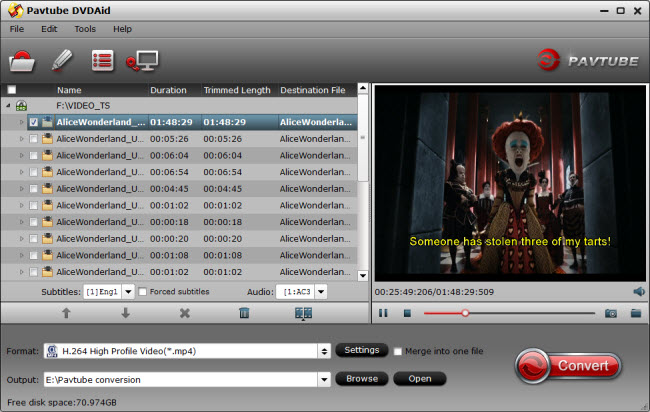
Step 3. Set Profile.
To customize the video size and adjust the audio channels? Don’t forget to get into the ‘Settings’ interface before you click the ‘Convert’ to start your work. For example, video size as 1280*800, frame rate as 29.97 and bitrates as 3000? All you can set as your personal ideas here:
Step 4. Start Conversion.
Click the "Convert" button on program interface to start the MKV, AVI, VOB, FLV, Tivo, WMV format video to MP4 for Amazon Fire HD 10/8. After it finished, open output file destination, locate the created MP4 video and you could watch it on your Amazon Fire HD 10/8.
Read More:
- How to Watch Blu-ray on Amazon Fire HD10/8 Easily
- Google Nexus 7 Video Converter: How to Play AVI/WMV/MKV/MP4 on Nexus 7?
- How to Recode DRM Video from iTunes for Playing on Amazon Fire HD 10/8
- How to Play WMA, OGG, FLAC Files in iTunes?
- Convert FLAC 5.1 audio MKV to HDX 1000 with AC3/AAC 5.1 audio


 Switch on your Dropbox and log it in.